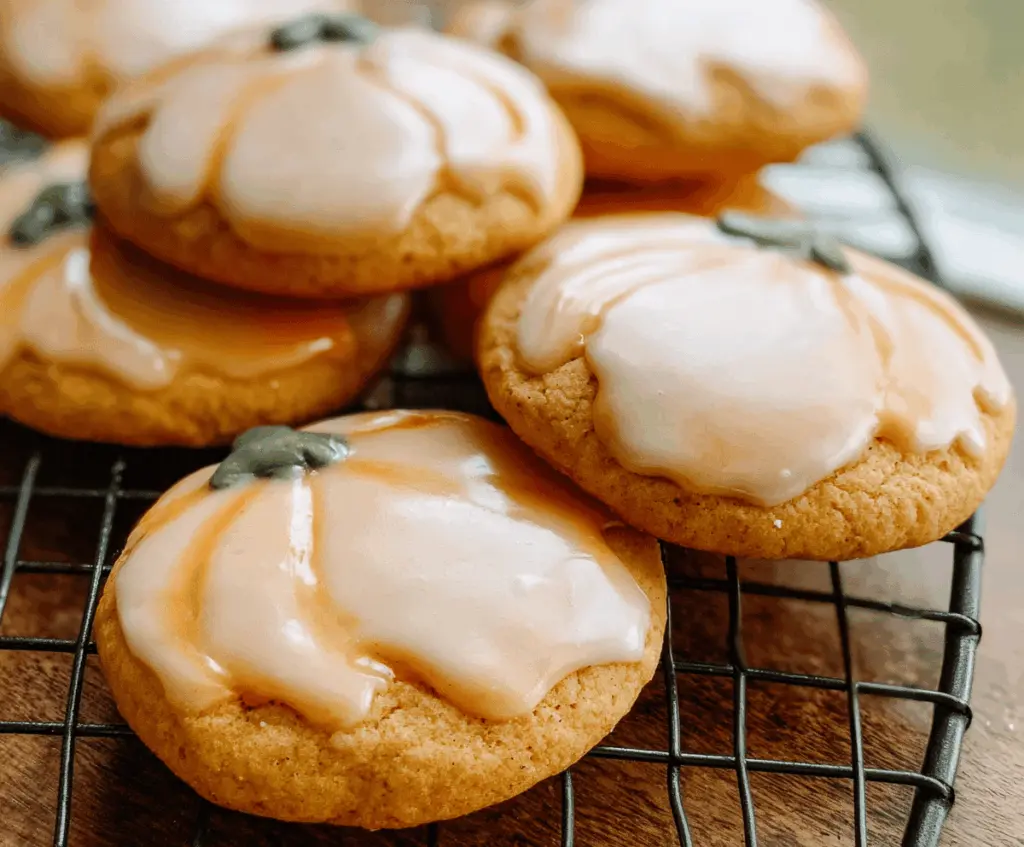
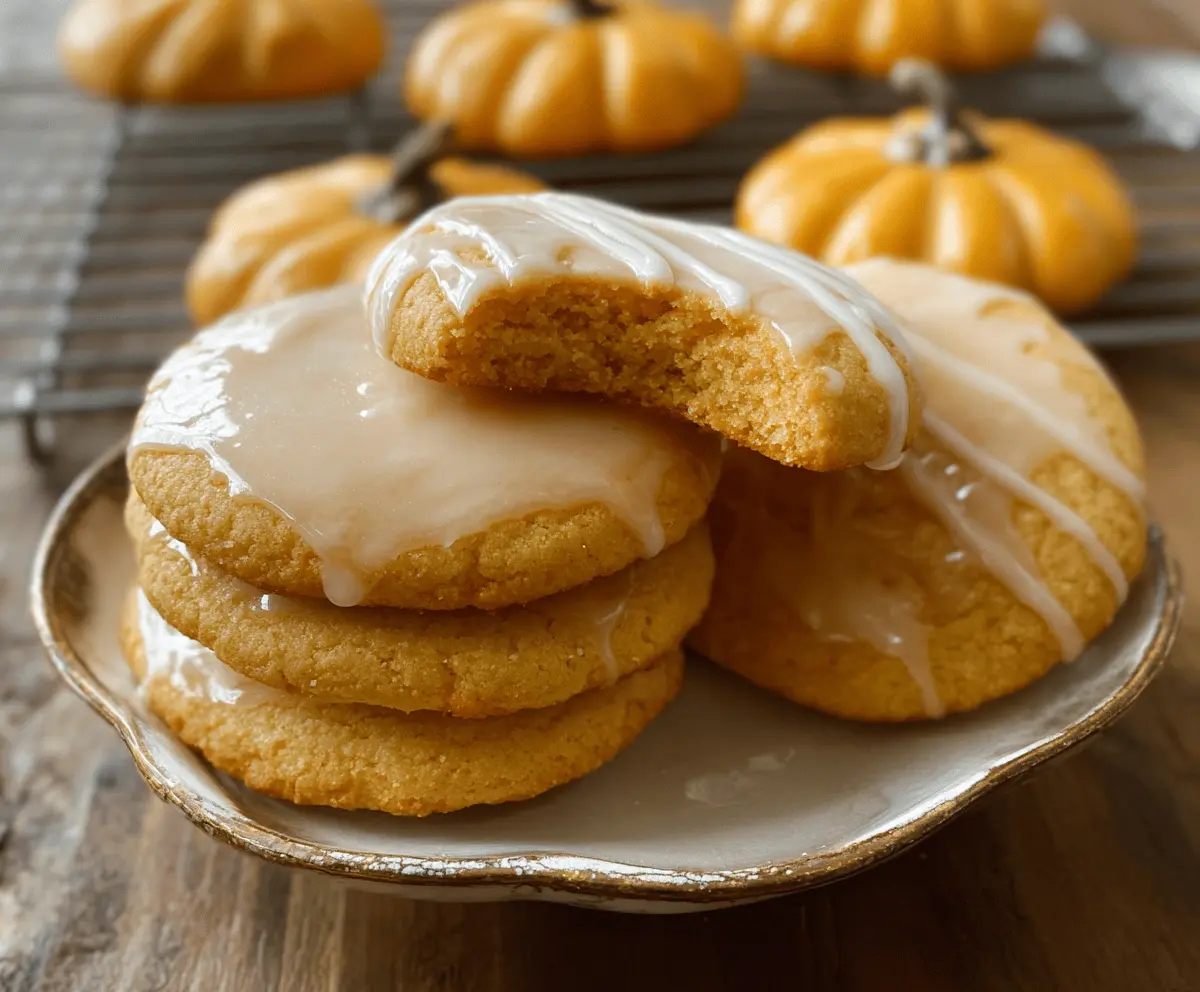
These Glazed Pumpkin Sugar Cookies are soft, sweet, and perfect for fall! With pumpkin spice and a sweet glaze on top, they are like little bites of happiness.
When I bake these cookies, my house smells amazing! They’re great for sharing with friends or enjoying with a warm cup of tea. And yes, I totally sneak a few for myself! 😊
Key Ingredients & Substitutions
Butter: Unsalted butter is best for this recipe. If you’re out, you can use margarine or coconut oil. Just keep in mind that the flavor may change a bit!
Pumpkin Puree: Canned pumpkin makes this easy, but fresh pumpkin works too! Just roast it, scoop out the flesh, and puree it. If you need a low-sugar option, try unsweetened applesauce instead.
Flour: All-purpose flour is ideal, but you can use whole wheat flour for a healthier twist. Just add a bit more liquid to the dough as whole wheat absorbs more moisture.
Pumpkin Pie Spice: If you don’t have this spice mix, make your own! Combine cinnamon, nutmeg, ginger, and cloves in equal parts for a great flavor.
Glaze: Instead of powdered sugar, you can create a glaze using honey or a sugar substitute like stevia, but it will change the texture and taste a little.
How Do You Achieve the Perfect Cookie Texture?
Making soft and chewy cookies is all about the right mixing and baking method. Here’s how to nail it!
- Don’t overmix the dough after adding the flour. Just mix until it’s combined. Overmixing can make cookies tough.
- Chill the dough for about 30 minutes. This helps prevent spreading and gives your cookies a nice, thick texture.
- Keep an eye on baking time. Cookies should be set at the edges but still soft in the center when you take them out. They’ll firm up as they cool.
Trust me, these tips will help you get fabulous cookies every time! Enjoy your baking adventure!
How to Make Glazed Pumpkin Sugar Cookies
Ingredients You’ll Need:
For the Cookies:
- 1 cup (2 sticks) unsalted butter, softened
- 1 cup granulated sugar
- 1/2 cup canned pumpkin puree
- 1 large egg
- 1 teaspoon vanilla extract
- 2 1/2 cups all-purpose flour
- 1 teaspoon baking soda
- 1/2 teaspoon baking powder
- 1/2 teaspoon salt
- 1 1/2 teaspoons pumpkin pie spice (or a mix of cinnamon, nutmeg, ginger, and cloves)
For the Glaze:
- 1 1/2 cups powdered sugar
- 2 tablespoons milk (plus more if needed)
- 1/2 teaspoon vanilla extract
- Orange and green food coloring (for decoration)
How Much Time Will You Need?
This recipe takes about 15 minutes to prepare and 10-12 minutes to bake. After baking, allow some time for the cookies to cool completely and for the glaze to set. Overall, plan for about 1 hour before serving your delicious pumpkin cookies.
Step-by-Step Instructions:
1. Prepping Your Oven and Baking Sheets:
Start by preheating your oven to 350°F (175°C). While it heats, line your baking sheets with parchment paper or silicone mats to prevent sticking.
2. Creaming the Butter and Sugar:
In a large bowl, use a mixer to cream together the softened butter and granulated sugar. Mix until the mixture is light and fluffy. This usually takes about 2-3 minutes.
3. Mixing in the Wet Ingredients:
Add the pumpkin puree, egg, and vanilla extract to the bowl. Beat everything together until it’s well combined. You’ll want a smooth mixture here!
4. Combining the Dry Ingredients:
In another bowl, whisk together the flour, baking soda, baking powder, salt, and pumpkin pie spice. This helps ensure everything is mixed evenly. It’s important to get these dry ingredients right!
5. Bringing It All Together:
Gradually add the dry mixture to the wet mixture. Gently mix until everything is just combined—don’t overmix or your cookies may become tough!
6. Scooping the Dough:
Using a cookie scoop or a tablespoon, drop about 2 tablespoons of dough onto the prepared baking sheets. Make sure to space the cookies about 2 inches apart! Flatten each cookie slightly with the back of a spoon or your fingers.
7. Baking Time:
Pop the baking sheets into your preheated oven and bake for 10-12 minutes. The edges should be set and the tops will look lightly cracked. Keep an eye on them, as oven times can vary!
8. Cooling the Cookies:
Once baked, remove them from the oven and let the cookies cool on the baking sheet for about 5 minutes. Then, transfer them to a wire rack to cool completely.
9. Making the Glaze:
While the cookies cool, it’s time to prepare the glaze! In a bowl, mix the powdered sugar, milk, and vanilla extract until smooth. If it’s too thick, add a few drops more of milk until you get your desired consistency.
10. Coloring the Glaze:
Divide the glaze and color a small part green for the pumpkin stems. Color the larger portion orange for the pumpkins—you can adjust the amount of food coloring to get your preferred shade!
11. Glazing the Cookies:
Once the cookies are fully cooled, use a spoon or small brush to spread the orange glaze over the top of each cookie, shaping them like pumpkins. Finally, add a dab of green for the stems at the top.
12. Final Touches:
Let the glaze set completely before serving or storing your cookies. This will give them a beautiful shine and more stability!
Enjoy your delightful, festive, and beautifully glazed Pumpkin Sugar Cookies. They’re sure to be a hit with family and friends!
img src=”https://panperfected.com/wp-content/uploads/2025/09/glazed-pumpkin-sugar-cookies.webp” alt=””>
Can I Use Fresh Pumpkin Instead of Canned?
Absolutely! If you prefer fresh pumpkin, just roast it until soft, scoop out the flesh, and puree it. Make sure to drain any excess liquid to avoid a watery dough.
How Should I Store the Cookies?
Store the cooled cookies in an airtight container at room temperature for up to 5 days. If you want to keep them longer, you can freeze the cookies. Just make sure to layer them with parchment paper to prevent sticking!
Can I Make These Cookies Gluten-Free?
Yes, you can use a gluten-free all-purpose flour blend in place of regular flour. Just check that the blend contains xanthan gum for the best texture!
How Can I Adjust the Sweetness of the Glaze?
If you find the glaze too sweet, you can reduce the amount of powdered sugar and add more milk to balance it. Alternatively, try using a bit of lemon juice for some tang!