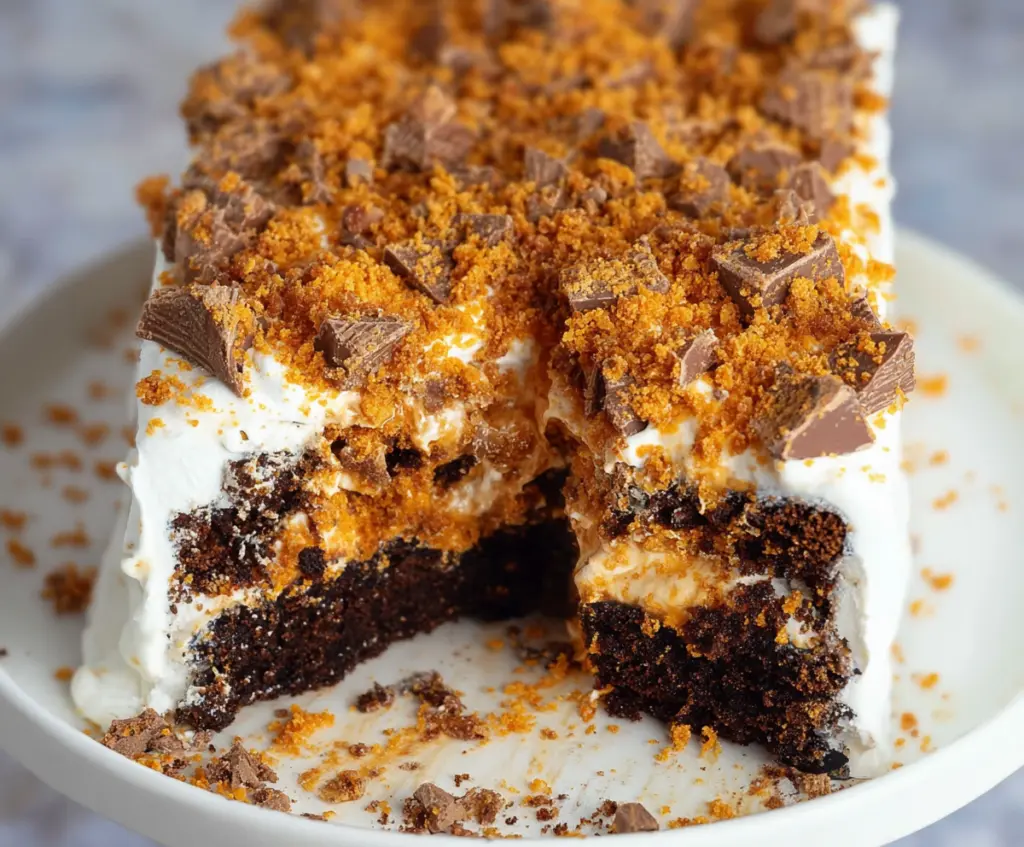
This Butterfinger Cake is a chocolate lover’s dream! With layers of moist cake, creamy frosting, and crunchy Butterfinger candy, it’s totally irresistible.
Trust me, it’s hard to stop at just one slice. I usually end up hiding the last piece for myself. Who can blame me? It’s that good! 😋
Key Ingredients & Substitutions
Chocolate Cake Mix: A box mix makes this recipe quick and easy. If you’re feeling adventurous, you can use a homemade chocolate cake recipe for a richer flavor.
Cream Cheese: Cream cheese gives the frosting its tangy flavor. If you’re lactose intolerant, you can use a dairy-free cream cheese or omit it altogether for a lighter topping.
Unsalted Butter: Always choose unsalted to have better control over the cake’s saltiness. If you need a dairy-free option, vegan butter works as a substitute just fine.
Whipped Topping: I like using Cool Whip for ease, but homemade whipped cream can be a delightful option if you’d prefer. Just be sure to whip it to soft peaks.
Butterfinger Bars: Of course, the star of the show! If you can’t find these or want a different flavor, try using Reese’s peanut butter cups or crushed Kit Kats instead.
What’s the Best Way to Prepare the Cake Batter for the Perfect Texture?
Getting the batter right is crucial for a moist cake. Follow these tips to enhance your cake’s texture:
- Start by mixing your dry ingredients well before adding wet ingredients. This helps ensure even distribution.
- Don’t overmix the batter! Stir until just combined, as this can lead to a dense cake.
- Let the batter sit for a few minutes before pouring it into the pan. This allows air bubbles to escape for a softer texture.
- Always preheat your oven. An evenly heated oven ensures that your cake rises properly.
With these ingredients and techniques, your Butterfinger Cake will turn out delicious every time! Enjoy whipping this up for friends and family.
Butterfinger Cake
Ingredients:
- 1 box chocolate cake mix (or homemade chocolate cake recipe)
- Ingredients required for the cake mix (usually eggs, oil, water)
- 1 package (8 oz) cream cheese, softened
- 1/2 cup unsalted butter, softened
- 2 cups powdered sugar
- 1 teaspoon vanilla extract
- 1 tub (8 oz) whipped topping (like Cool Whip), thawed
- 4-5 Butterfinger candy bars, chopped into small pieces plus extra for topping
- Caramel sauce (optional, for drizzling)
How Much Time Will You Need?
This Butterfinger Cake will take about 15 minutes of prep time plus the baking time indicated on the cake mix box. It’s helpful to let it chill for at least 1 hour after assembly, allowing the flavors to meld and the frosting to set. So, overall, you will need a little over 2 hours for the whole process!
Step-by-Step Instructions:
1. Bake the Cake:
Preheat your oven to the temperature indicated on your cake mix box. In a mixing bowl, prepare the cake batter according to the package instructions, adding the required eggs, oil, and water. Pour the batter into a greased 9×13-inch baking pan and bake as instructed until a toothpick inserted into the center comes out clean. Once baked, let the cake cool completely in the pan.
2. Make the Frosting:
In a mixing bowl, use a hand mixer to beat the softened cream cheese and softened butter together until smooth and creamy. Gradually add the powdered sugar and vanilla extract; beat until everything is well combined. Gently fold in the whipped topping to create a light and fluffy frosting.
3. Assemble the Cake:
Spread half of the frosting evenly over the cooled cake. Sprinkle the chopped Butterfinger pieces over the frosting layer. Then, spread the remaining frosting evenly on top of the Butterfinger layer, creating a luscious topping. For the final touch, sprinkle extra chopped Butterfinger pieces on top and drizzle with caramel sauce if desired.
4. Chill and Serve:
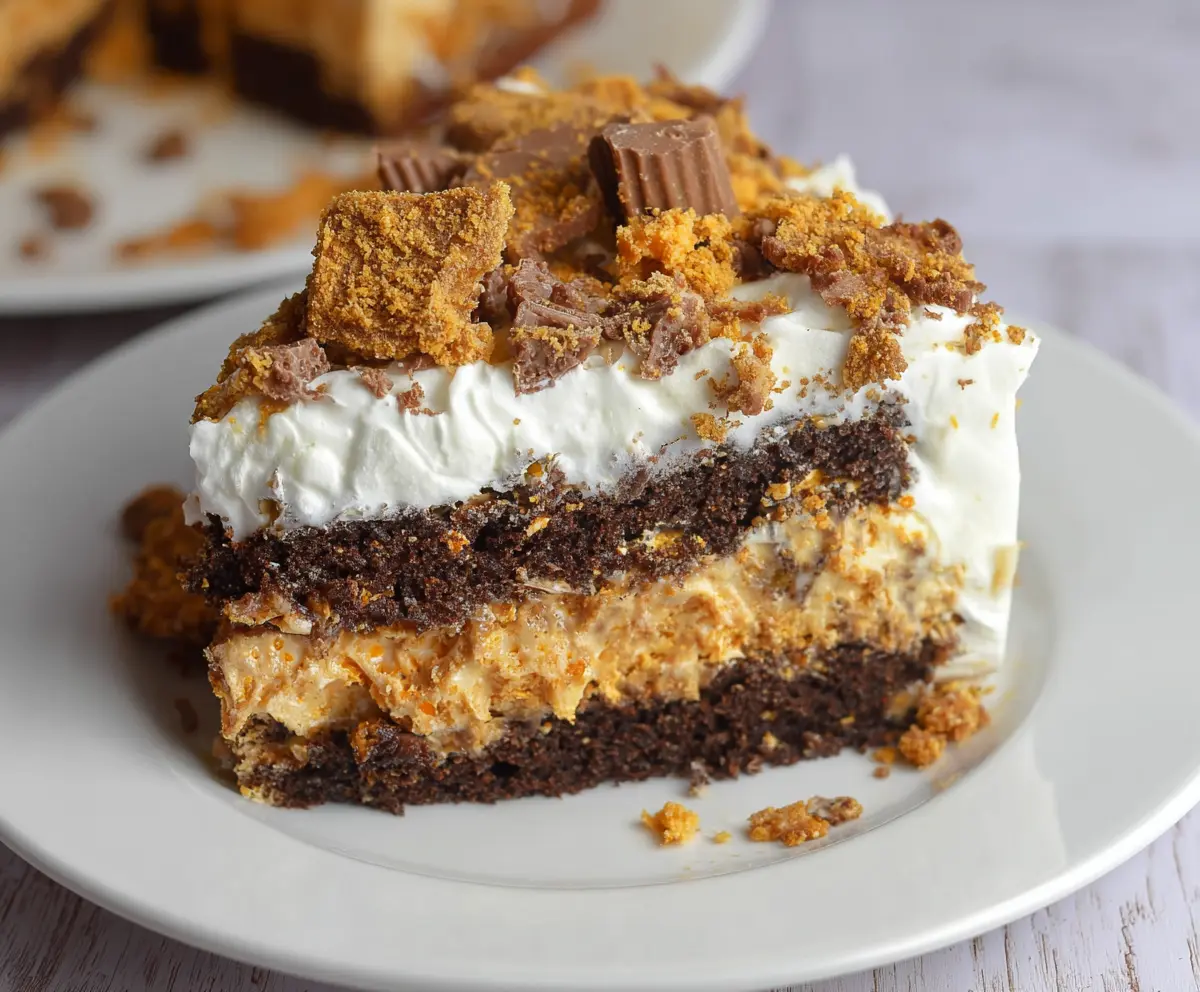
Cover the cake and refrigerate for at least 1 hour before serving. This step helps the layers set and allows the flavors to blend together beautifully. When you’re ready to serve, slice the cake and enjoy the rich, creamy, and crunchy goodness of this Butterfinger delight!
This cake is sure to be a hit at any gathering or as a sweet treat for yourself. Each slice is filled with chocolatey goodness, creamy frosting, and the irresistible crunch of Butterfinger candy!
Can I Use a Different Cake Flavor?
Absolutely! While chocolate cake pairs perfectly with Butterfinger, you can use vanilla or even a peanut butter cake mix for a fun twist. Just keep the other ingredients the same!
How Can I Make This Cake Gluten-Free?
To make this cake gluten-free, use a gluten-free chocolate cake mix. Ensure that all other ingredients, including the whipped topping and any add-ins, are also gluten-free to avoid cross-contamination.
How Do I Store Leftovers?
Store any leftover cake in an airtight container in the refrigerator for up to 3 days. If you want to keep it longer, you can freeze individual slices wrapped tightly in plastic wrap for up to a month. Just thaw in the fridge before enjoying!
Can I Make This Cake Dairy-Free?
Yes! Substitute the cream cheese with a dairy-free cream cheese alternative, use vegan butter, and opt for a dairy-free whipped topping. This way, everyone can enjoy the tasty Butterfinger Cake!