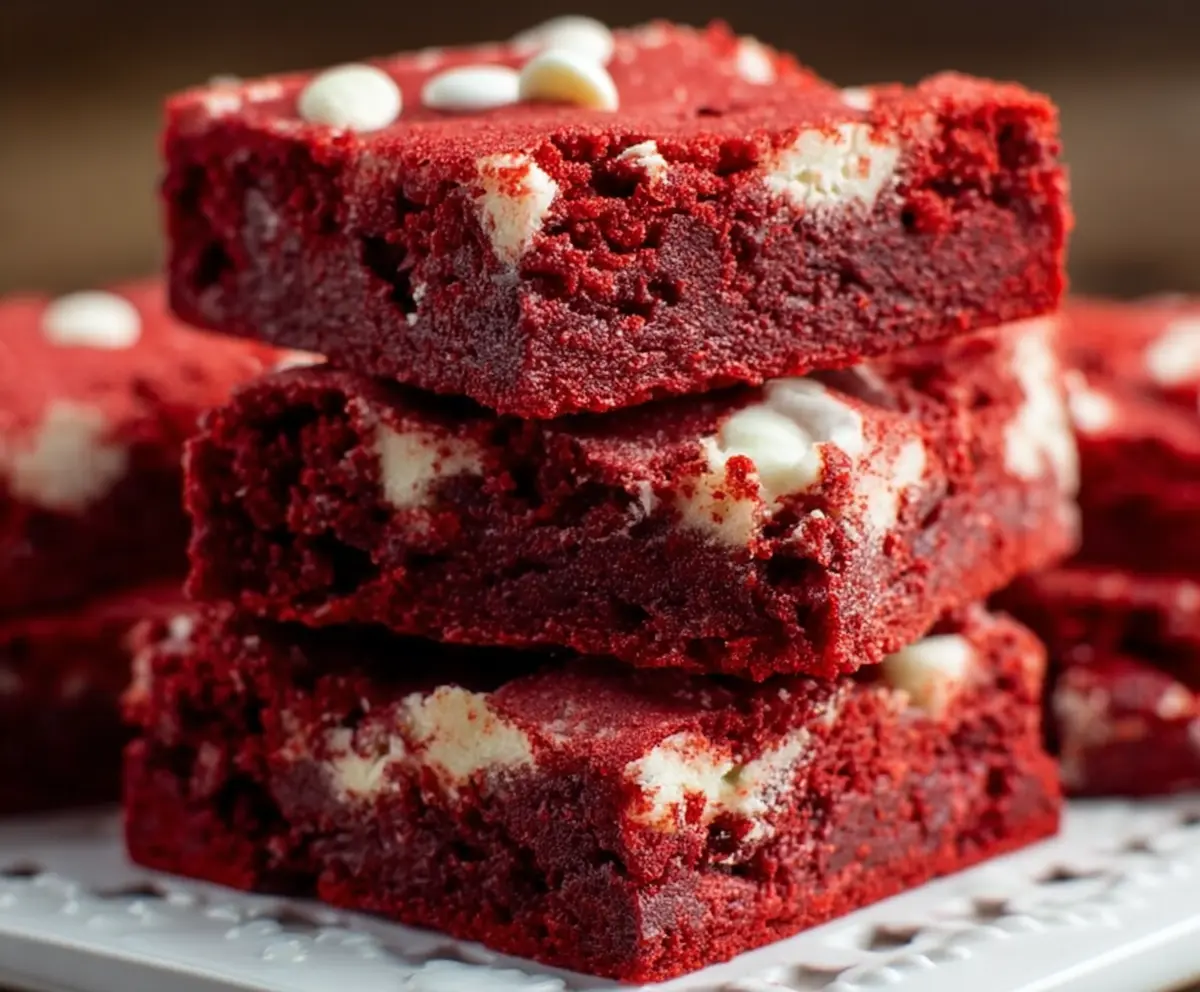
Red Velvet Brownies are a fun twist on classic brownies, featuring a vibrant red color and a hint of cocoa flavor. These treats are soft, rich, and topped with a creamy cream cheese frosting!
Every bite feels like a celebration, and the color makes them perfect for parties. I love serving them to guests and watching their faces light up. Who doesn’t love a chocolatey surprise? 🍫
Key Ingredients & Substitutions
Butter: Unsalted butter gives you control over the salt content. If you need a dairy-free option, substitute with coconut oil or a vegan butter alternative. Always melt it first for easy mixing!
Sugar: Granulated sugar provides sweetness and structure. If you want a slightly different flavor, try using brown sugar instead. It adds a touch of caramel flavor and moisture.
Cocoa Powder: Use unsweetened cocoa powder for a balanced chocolate flavor. If you’re out, try Dutch-processed cocoa, but reduce the baking powder slightly, as it’s less acidic.
Red Food Coloring: Gel food coloring works best for vibrant color without adding too much liquid. If you want a natural alternative, beet juice can be an option, but the color will be softer.
White Chocolate Chips: These add a sweet, creamy element. If you prefer dark chocolate, feel free to swap them out for dark or semi-sweet chocolate chips. It gives a nice contrast to the red velvet.
How Do You Achieve a Perfectly Swirled Brownie Layer?
Creating a beautiful swirl can be a fun part of making these red velvet brownies! Here’s how to do it without messing up:
- Start by pouring half of your brownie batter into the pan and spread it evenly.
- Sprinkle white chocolate chips on top, then pour the rest of the batter. Smooth the top carefully.
- Now, grab a knife and gently swirl it through the top layer without mixing too much. Aim for a figure-eight motion!
- Be careful not to over-swirl. You want to see that lovely red and white contrast when they bake!
Enjoy your baking adventure with these delicious Red Velvet Brownies!
Red Velvet Brownies
Ingredients You’ll Need:
For the Brownie Batter:
- 1 cup (2 sticks) unsalted butter, melted
- 2 cups granulated sugar
- 2 large eggs
- 2 teaspoons vanilla extract
- 2 tablespoons cocoa powder (unsweetened)
- 2 1/2 cups all-purpose flour
- 1 teaspoon baking powder
- 1/2 teaspoon salt
- 1 tablespoon red food coloring
For the Swirl:
- 1 cup white chocolate chips or chunks
How Much Time Will You Need?
This recipe takes about 15 minutes for prep and 30-35 minutes for baking, with an extra time for cooling afterward. In total, you’ll spend around an hour working on these delightful treats, and then they need some time to chill before cutting into squares.
Step-by-Step Instructions:
1. Prepare the Oven and Pan:
Start by preheating your oven to 350°F (175°C). While it’s warming up, grab a 9×13-inch baking pan. Grease it lightly with butter or cooking spray, or line it with parchment paper for easy removal later.
2. Make the Brownie Mixture:
In a large mixing bowl, whisk together the melted butter and granulated sugar until it’s nice and smooth. Add in the eggs one at a time, mixing well after each addition. Then stir in the vanilla extract until everything is combined.
3. Combine the Dry Ingredients:
In a separate bowl, whisk together the cocoa powder, all-purpose flour, baking powder, and salt. This helps to evenly distribute the dry ingredients. Gradually add this mixture to the wet ingredients, mixing just until combined. Be careful not to overmix!
4. Add the Red Color:
Now, it’s time to get that beautiful red color! Stir in the red food coloring until your batter is evenly colored and looks deliciously vibrant.
5. Layer the Batter:
Pour half of the brownie batter into the prepared pan, spreading it out evenly. Sprinkle half of the white chocolate chips over the top. Then pour the remaining batter over this layer and smooth it out. Finally, sprinkle the rest of the white chocolate chips on top.
6. Create a Swirl:
If you want that beautiful marbled effect, take a knife and gently swirl it through the top layer of batter. Be careful not to mix it too much; you still want some of the red to show!
7. Bake Those Brownies:
Place the pan in the oven and bake for 30-35 minutes. It’s done when a toothpick inserted into the center comes out with a few moist crumbs (not wet batter).
8. Cool and Slice:
Once baked, remove the brownies from the oven and let them cool in the pan on a wire rack. Make sure they are completely cooled before cutting them into squares for serving.
Enjoy your rich, moist red velvet brownies with delightful white chocolate chips throughout! Perfect for any celebration or just to satisfy a sweet craving!
Can I Use Different Types of Food Coloring?
Yes! While red food coloring is traditional, you can use gel food coloring for a more vibrant color without adding too much liquid. If you prefer a natural option, beet juice works, though it will give a more muted color.
How Should I Store Leftover Brownies?
Store leftover brownies in an airtight container at room temperature for 3-4 days. If you want to keep them longer, you can freeze them. Just wrap the brownies in plastic wrap and place them in a freezer-safe bag for up to 3 months. Thaw them at room temperature before serving.
Can I Add Nuts to the Brownie Batter?
Absolutely! Chopped walnuts or pecans would add a nice crunch. Just fold in about 1/2 to 1 cup of your preferred nuts when mixing the dry ingredients with the wet ones.
What’s the Best Way to Cut Brownies?
For clean cuts, use a sharp knife. It helps to warm the knife slightly under hot water, then wipe it dry before cutting. This will create nice, clean edges and prevent the brownies from crumbling.