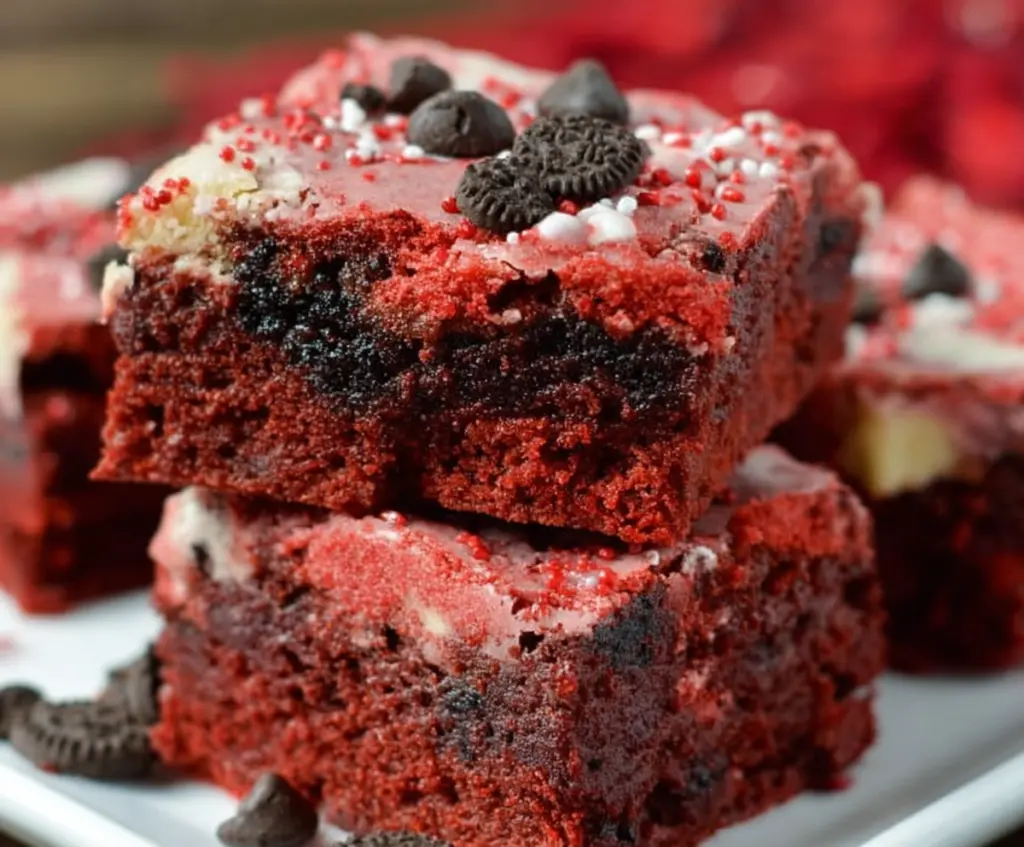
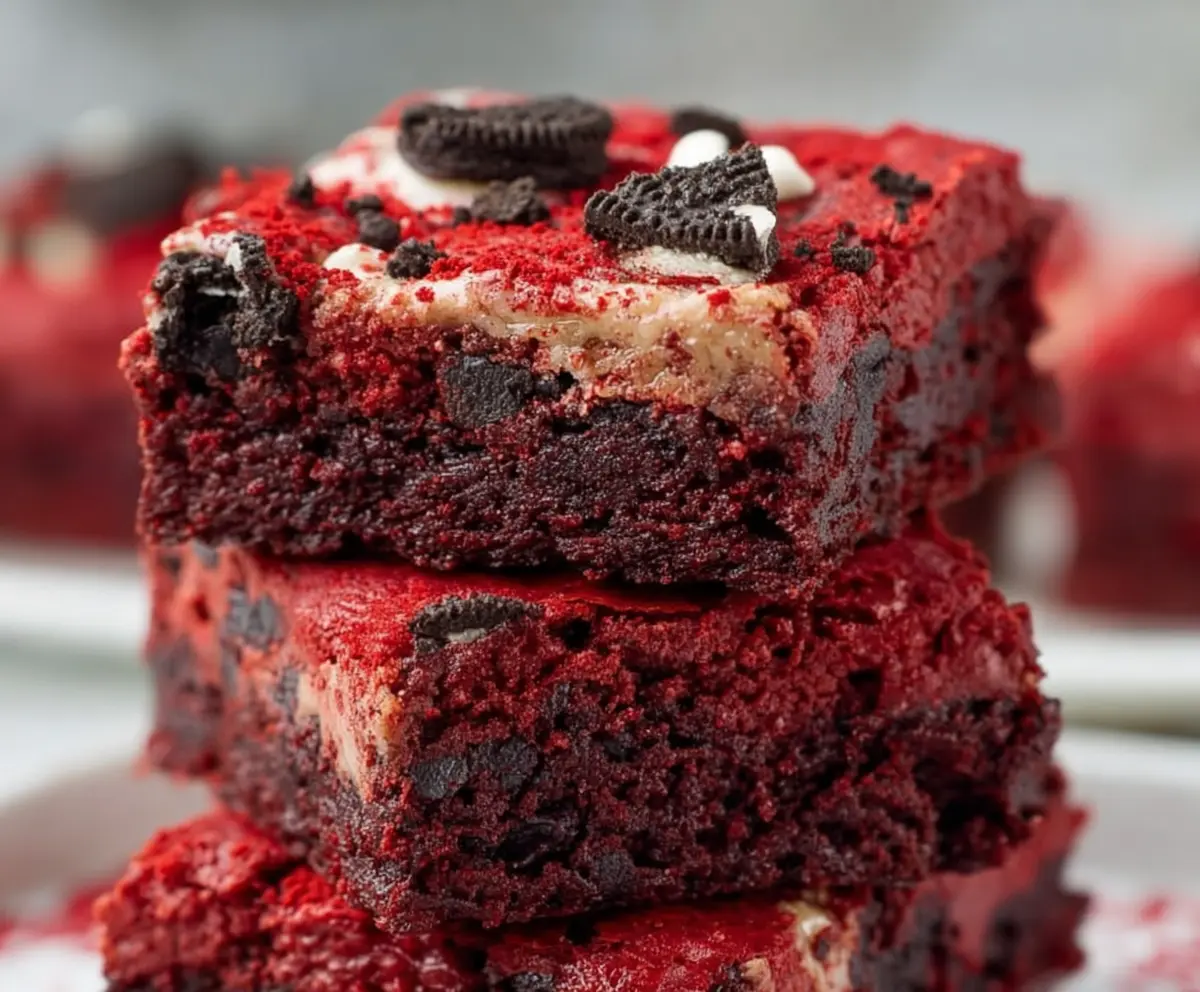
These Oreo Red Velvet Brownies are a tasty treat that brings together rich red velvet and chocolatey Oreos. It’s like a party for your taste buds!
I love how the cookies add a fun crunch to the soft brownies. Plus, the red color is perfect for celebrations. You might just eat more than one… I know I always do! 😋
Key Ingredients & Substitutions
Unsalted Butter: Using unsalted butter is great to control the saltiness of your brownies. If you’re in a pinch, feel free to use salted butter; just skip adding the extra salt in the recipe.
Granulated Sugar: White sugar gives these brownies sweetness and helps with texture. If you want a bit of a molasses flavor, try brown sugar or a mix of both for a richer taste.
Red Food Coloring: It’s key for that signature red velvet look. You can use gel food coloring for a stronger color or beet juice for a natural option, but the shade may vary.
Buttermilk: This adds moisture and a slight tang. No buttermilk? Mix regular milk with a bit of lemon juice or vinegar (1 tablespoon of acid per cup of milk) to mimic the sour taste!
Mini or Regular Oreos: Oreos add a fun crunch and chocolate flavor. If you need a gluten-free option, you can use gluten-free cookies or even chocolate chip cookies for a twist!
How Do I Achieve the Perfect Brownie Texture?
Getting that perfect brownie texture requires just the right mixing and baking times. Here are some tips for success:
- Mix until just combined when adding the dry ingredients to avoid tough brownies. Overmixing can take out all that lovely fudginess!
- Check the brownies a few minutes before the suggested baking time. Each oven is different, so yours might cook a bit faster.
- Let them cool fully before cutting. This helps them set up and makes for cleaner edges when slicing!
Enjoy baking these delightful treats, and don’t hesitate to share your results!
How to Make Oreo Red Velvet Brownies
Ingredients You’ll Need:
- 1 cup (2 sticks) unsalted butter, melted
- 2 cups granulated sugar
- 3 large eggs
- 1 teaspoon vanilla extract
- 2 ½ cups all-purpose flour
- 1 tablespoon unsweetened cocoa powder
- 1 teaspoon baking powder
- ½ teaspoon salt
- 2 tablespoons red food coloring
- ½ cup buttermilk
- 1 teaspoon white vinegar
- 1 cup mini Oreo cookies or regular Oreo cookies, roughly chopped
- ½ cup white chocolate chips (optional, for extra sweetness)
- Red and white sprinkles for topping (optional)
How Much Time Will You Need?
This delicious recipe takes about 15 minutes for prep and 40 minutes for baking, plus some time to cool. Altogether, you’ll need about an hour to an hour and a half before you can dig in. So worth the wait!
Step-by-Step Instructions:
1. Preheat the Oven:
Start by preheating your oven to 350°F (175°C). While the oven is heating, lightly grease a 9×13 inch baking pan and line it with parchment paper or aluminum foil. Leave some overhang so you can easily lift the brownies out later.
2. Mix Wet Ingredients:
In a large mixing bowl, whisk together the melted butter and granulated sugar until well combined. Then, add the eggs one at a time, mixing well after each addition. Stir in the vanilla extract until everything is nicely blended.
3. Combine Dry Ingredients:
In a separate bowl, sift together the flour, cocoa powder, baking powder, and salt. This helps to avoid clumps and ensures an even texture in your brownies.
4. Get Colorful:
In another small bowl, combine the red food coloring, buttermilk, and white vinegar. This mixture will give your brownies that beautiful red velvet color and moistness.
5. Mix It All Together:
Now, it’s time to bring everything together! Alternately add the dry ingredients and the red food coloring mixture to the wet mixture. Start and end with the dry ingredients. Mix gently until everything is just combined—don’t overmix to keep those brownies nice and fudgy!
6. Add the Cookies:
Gently fold in the chopped Oreo cookies and the white chocolate chips if you’re using them. This adds delightful bits of cookie goodness throughout.
7. Bake the Brownies:
Pour the brownie batter into your prepared baking pan and spread it out evenly. If you like, sprinkle some extra chopped Oreos and festive red and white sprinkles on top.
8. Time to Bake:
Put the brownie pan in the oven and bake for 35-40 minutes. Keep an eye on them! The brownies are done when a toothpick inserted into the center comes out with a few moist crumbs but not wet batter.
9. Cool and Serve:
Let the brownies cool completely in the pan on a wire rack. Once cooled, lift them out using the parchment paper or foil edges, and cut into squares. Serve and enjoy your rich Oreo Red Velvet Brownies with a nice glass of milk or your favorite drink!
These brownies will impress with their moistness and delightful flavors, making them perfect for gatherings, celebrations, or just a special treat for yourself!
Can I Use a Different Type of Sugar?
Yes! While granulated sugar gives the brownies the right sweetness and texture, you can substitute with brown sugar for a deeper flavor. Just keep in mind that it may result in a slightly denser brownie.
Can I Use Whole Milk Instead of Buttermilk?
Absolutely! If you don’t have buttermilk, you can easily make a substitute by mixing ½ cup of milk with 1 teaspoon of lemon juice or vinegar. Let it sit for about 5 minutes before using it in the recipe.
How Should I Store Leftover Brownies?
Store any leftover brownies in an airtight container at room temperature for up to 3 days. If you want them to last longer, you can refrigerate them for up to a week. Just remember to warm them up a bit in the microwave before serving for that fresh-out-of-the-oven taste!
Can I Freeze These Brownies?
Yes, you can! To freeze, wrap the brownies tightly in plastic wrap or aluminum foil and store them in a freezer-safe container. They’ll keep well for up to 2 months. When you’re ready to enjoy, let them thaw in the fridge overnight or at room temperature for a few hours.